Hints: Program 4
|
Assignments |
Extra Credit |
Outputs |
Requirements |
Hints:
Program 4
-
- Use a control array for the Data-Aware
labels that will be using the fields from the phone
table found in the Employee database on the
student disk to assign the captions of the labels. Name
this array either lblEmployee or lblPhone.
To make the label array look like text boxes change the BorderStyle
property from 0 - None to 1 - Fixed Single, and the BackColor
property from gray to white.
- To Find the Phone Icon used for the icon property of the form,
click
 on the right side of the icon property in the property window, click
 (
(
 button ), then use the
following path; Common\Graphics\Icons\Comm\Phone16.ico.
Note Home Users: The Common folder containing the Graphics folder
will not be installed on your hard drive if you installed Visual Basic
using the Typical Button, you need to put your Visual Basic Install CD
into your computer and use the Custom Install button, put a check mark
into the check box that says Graphics, this will put all the pictures on
your hard drive it uses about 50 meg of memory.
- Create a Menu System with Access keys and Shortcuts.
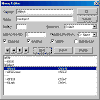
Click the icon to the right to see the Menu Editor menu structure. Click the
back button on the browser when done.
- Create a shortcut menu for the Select Menu to use it to
move to the Next, Previous, First and Last records in the
employee database. Use the following code statement to display the
shortcut menu in the center of the screen. After entering the code shown
below in red drag through the keywords PopUpMenu and MouseUp
to and press the F1 function key to understand the options
used in the statement below.
Private Sub Form_MouseUp(Button As
Integer, Shift As Integer, X As
Single, Y As Single)
'Display Select Shortcut
menu in center of form when the right mouse button is clicked
If Button = vbRightButton Then
_
PopupMenu
mnuSelect, vbPopupMenuCenterAlign, _
ScaleWidth / 2, ScaleHeight / 2
End Sub
- Use checkmarks in Select Menu to show that the Next,
Previous, First and Last records in the employee database
have been selected. (The last menu option used will display a check mark
when the menu is accessed again)
Note Windows 2000 and XP users: The & character used in the
caption property of the menu items will not cause the letters in the menu
names to be underlined until the Alt-key is pressed, then all access keys
will be displayed. To change this default in Windows XP,
right-click on the Windows Desktop, click Properties at the bottom of
the popup menu, click the Appearance tab at the top of the dialog box, click
the Effects... command button, uncheck the checkbox labeled Hide
underlined letters for keyboard navigation until I press the Alt key, click
the OK button on the Effects dialog box, click the OK button on the Display
Properties dialog box.
- For code for the check marks don't use the ToggleView
Procedure from the book since it removes fields from the
form. Set the checked property to true when the menu
option is selected on the menu, and the other three menu
choices checked property to false using code statements.
These menu choices should be mutually exclusive. Only one
menu option can have a check mark at a time.
- Checkmarks code for the Next Record Menu Option: (mnuNext_Click)
mnuNext.Checked = True
mnuPrev.Checked = False
mnuFirst.Checked = False
mnuLast.Checked = False
Use similar checkmark code statements for mnuPrev, mnuFirst, mnuLast, Click
events and the Form_Load event.
- Potential Problem with Access 2000,2002 and VB6:
Some students are getting an error message about an ISAM file when trying to
use the data control. To correct the problem change the Connect
property of the data control from Access 2000; to Access,
reset the DatabaseName
property to a:/employees.mdb, change the RecordSource
property from Employees to Phone. These
changes should make the ISAM error message disappear.
Alternative to Data Control to access fields in a database: (Working
Model edition of VB will not support this method!)
Start a completely new standard .EXE Visual Basic
project to use the Data Environment Method for extra credit, do not use the form from the
previous method!
Printouts required for Extra Credit: (Data
Environment Method)
Blank form, Properties, Code, and same four records as regular assignment.
|
Assignments |
Extra Credit |
Outputs |
Requirements |